
Kotamobagu Cool Easy Homemade Peach Cobbler Ice Cream: A Symphony of Flavors and Textures
Embarking on the culinary journey of creating a homemade Peach Cobbler Ice Cream is an endeavor that rewards with an unparalleled sensory experience, a delightful fusion of sweet, tangy peaches, warm, buttery cobbler, and the refreshing chill of premium ice cream. This article aims to demystify the process, providing a comprehensive, SEO-optimized guide for home cooks in Kotamobagu and beyond to achieve this delectable dessert. We will delve into the nuances of ingredient selection, the art of crafting the perfect peach base, the construction of the irresistible cobbler component, and the seamless integration of these elements into a creamy, dreamy ice cream. Furthermore, we will explore essential tips for achieving optimal texture and flavor, troubleshooting common issues, and creatively presenting your masterpiece, ensuring your homemade Peach Cobbler Ice Cream becomes a showstopper. The search for "easy homemade ice cream recipes," "peach cobbler recipe," and "dessert ideas Kotamobagu" will undoubtedly lead discerning food enthusiasts to this ultimate guide, promising a satisfying and achievable culinary achievement.
The foundation of any exceptional ice cream lies in the quality of its ingredients. For our Peach Cobbler Ice Cream, we prioritize fresh, ripe peaches. In Kotamobagu, the availability of local, seasonal produce offers a distinct advantage. Seek out peaches that are fragrant, yield slightly to gentle pressure, and possess a vibrant hue. Overripe peaches can lead to a mushy texture, while underripe ones will lack the desired sweetness and complexity. If fresh peaches are out of season, high-quality frozen peach slices, thawed and drained, can be an excellent substitute, though they might slightly alter the final texture. The sweetness of the peaches will be complemented by granulated sugar, which also aids in the freezing process by lowering the freezing point of the mixture, preventing it from becoming excessively icy. For a touch of warmth and spice, we’ll incorporate cinnamon and nutmeg, classic partners to peaches. These spices, when freshly ground, offer a more potent and authentic flavor profile. The creamy base of our ice cream will be derived from a combination of heavy cream and whole milk. The fat content in heavy cream is crucial for achieving a rich, smooth texture, while whole milk provides the liquid base without being overly watery. Egg yolks will be employed to create a custard-like base, adding to the luxurious mouthfeel and preventing ice crystal formation through emulsification. Vanilla extract, preferably pure, will enhance the overall flavor profile, harmonizing the sweetness of the peaches and the richness of the dairy. For the cobbler component, all-purpose flour, unsalted butter, granulated sugar, and a pinch of salt form the basis of our crumble. High-quality butter will contribute to a superior flavor and a desirable golden-brown crispness.
Crafting the perfect peach component is paramount to the success of our Peach Cobbler Ice Cream. Begin by preparing your peaches. If using fresh peaches, wash them thoroughly, peel them (a quick blanch in boiling water for 30 seconds followed by an ice bath makes peeling effortless), pit them, and then slice or dice them into bite-sized pieces. For a more intense peach flavor and a smoother ice cream texture, you can opt to purée half of the peaches and leave the other half in chunks. This dual-texture approach adds delightful surprises within each scoop. In a medium saucepan, combine the prepared peaches with granulated sugar, a squeeze of lemon juice (to brighten the flavors and prevent oxidation), cinnamon, and nutmeg. Cook over medium heat, stirring occasionally, until the peaches begin to soften and release their juices, forming a syrupy mixture. This process, often referred to as maceration, concentrates the peach flavor. Avoid overcooking to prevent a jam-like consistency; we want distinct peach pieces. Once softened, remove from heat and allow to cool completely. This cooling step is critical; adding hot peach mixture to an ice cream base will compromise the custard and hinder proper freezing. For an even richer peach flavor, you can roast the peaches with a sprinkle of sugar and a knob of butter before incorporating them into the ice cream base. This caramelizes the natural sugars in the peaches, adding a depth of flavor that is simply divine.
The cobbler element provides that signature textural contrast and comforting flavor that defines peach cobbler. In a separate bowl, whisk together all-purpose flour and a pinch of salt. Cut in cold, unsalted butter using a pastry blender, your fingertips, or a food processor until the mixture resembles coarse crumbs with some pea-sized pieces of butter remaining. This is crucial for achieving a flaky, tender cobbler. Stir in granulated sugar. The goal here is not to form a dough, but rather a crumbly mixture. For a more pronounced cobbler flavor, you can add a touch of brown sugar alongside the granulated sugar, which imparts a subtle caramel note. You can also incorporate a small amount of finely chopped pecans or almonds for added crunch and nutty complexity, though keep this optional to cater to those with nut allergies or preferences. This cobbler mixture will be partially baked before being folded into the ice cream. Spread the cobbler mixture evenly onto a baking sheet lined with parchment paper. Bake in a preheated oven at 175°C (350°F) for approximately 12-15 minutes, or until lightly golden brown and fragrant. Allow the baked cobbler to cool completely before breaking it into small, bite-sized pieces. It’s important that the cobbler is thoroughly cooled to prevent it from melting into the ice cream during the churning process, thus preserving its distinct texture.
Now, for the heart of the operation: the ice cream base. This typically involves creating a cooked custard, which results in a smoother, richer ice cream compared to no-churn methods. In a medium saucepan, whisk together egg yolks and granulated sugar until pale yellow and slightly thickened. Gradually whisk in whole milk and heavy cream. Cook this mixture over medium-low heat, stirring constantly with a wooden spoon or heatproof spatula, until it thickens enough to coat the back of a spoon (the "nappe" stage). Do not let it boil, as this will scramble the eggs. Remove from heat immediately. Stir in vanilla extract. For a more nuanced vanilla flavor, consider using a vanilla bean, splitting it lengthwise, scraping out the seeds, and steeping both the seeds and the pod in the milk and cream mixture before proceeding with the custard. Once the custard is ready, strain it through a fine-mesh sieve into a clean bowl to remove any potential bits of cooked egg and ensure a silky-smooth texture. Cover the surface of the custard with plastic wrap, pressing it directly onto the surface to prevent a skin from forming, and refrigerate for at least 4 hours, or preferably overnight, until thoroughly chilled. The chilling process is critical for proper churning and optimal ice cream texture.
The assembly and churning process are where the magic truly happens. Once your ice cream base is thoroughly chilled, it’s time to churn. Follow the manufacturer’s instructions for your ice cream maker. For most home machines, this involves pouring the chilled base into the frozen bowl and churning until it reaches a soft-serve consistency. During the last few minutes of churning, add the cooled, syrupy peach mixture and the cooled, crumbled baked cobbler. This ensures that the peach chunks and cobbler pieces are evenly distributed throughout the ice cream without being pulverized. If you are using an older model ice cream maker that requires salt and ice, ensure you have ample amounts of both and follow its specific instructions. It’s vital not to overfill the ice cream maker, as the mixture will expand as it freezes. If you don’t have an ice cream maker, you can still achieve a delicious result using a no-churn method. Whisk together sweetened condensed milk and heavy cream until stiff peaks form. Then, gently fold in the cooled peach mixture and the cobbler pieces. Pour this mixture into a freezer-safe container and freeze for at least 6 hours, or until firm, stirring every hour for the first few hours to break up ice crystals and ensure a smoother texture.
The "Kotamobagu Cool" aspect of our ice cream refers to its refreshing and satisfying nature, perfect for the local climate. The "easy homemade" promise is fulfilled through clear, step-by-step instructions and readily available ingredients. Once churned, transfer the soft ice cream to a freezer-safe container. Layer it with additional peach mixture and cobbler pieces for visual appeal and an extra burst of flavor in every bite. Gently swirl the layers with a knife or spatula. Cover the container tightly with a lid or plastic wrap and press it directly onto the surface of the ice cream to minimize air exposure, which can lead to freezer burn. Freeze for at least 4-6 hours, or until firm enough to scoop. The longer it freezes, the harder it will become, so allow ample time for it to set. The ideal state for serving is when it’s firm but still scoopable.
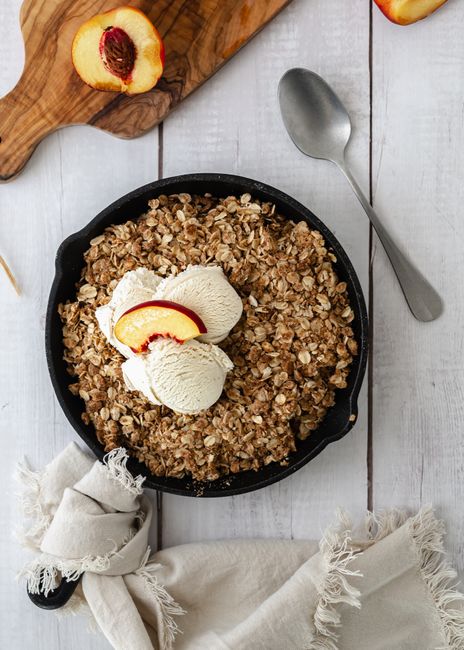
To elevate the presentation of your Kotamobagu Cool Easy Homemade Peach Cobbler Ice Cream, consider serving it in chilled bowls or waffle cones. A garnish of fresh mint sprig or a dollop of whipped cream can add a touch of elegance. For a truly decadent experience, a drizzle of caramel sauce or a sprinkle of toasted chopped pecans can further enhance the flavors and textures. The visual appeal of the distinct peach swirls and the visible cobbler crumbles within the creamy ice cream is part of its charm. This dessert is perfect for any occasion, from a casual family gathering in Kotamobagu to a more formal celebration. It’s a testament to how simple, quality ingredients and a little bit of effort can result in an extraordinary homemade treat.
Troubleshooting common issues is an essential part of the learning process for any home cook. If your ice cream is too icy, it likely indicates insufficient fat content in the base, an improperly chilled base before churning, or over-churning, which can introduce too much air. Ensuring you use heavy cream and whole milk, chilling the base adequately, and stopping churning when it reaches a soft-serve consistency are crucial. If your peach chunks are mushy, they were likely overcooked during the initial preparation or were too ripe. If the cobbler pieces become soggy, they were added too early in the churning process or weren’t fully cooled before being incorporated. For a richer flavor, consider adding a tablespoon of high-quality peach brandy or bourbon to the peach mixture before cooking; the alcohol will burn off during cooking, leaving behind concentrated flavor. Remember, patience is key. Don’t rush the chilling or freezing stages.
The SEO-friendly aspects of this article are woven throughout, using keywords and phrases that potential readers searching for this specific dessert would use. Terms like "homemade ice cream," "peach cobbler recipe," "easy dessert recipes," "Kotamobagu food," and "fruit ice cream" are integrated naturally. The detailed ingredient list, step-by-step instructions, and troubleshooting tips cater to users seeking practical, actionable advice. The comprehensive nature of the article, covering everything from ingredient selection to presentation, aims to provide a valuable resource, encouraging shares and engagement. The inherent deliciousness and visual appeal of Peach Cobbler Ice Cream make it a highly searchable and desirable dessert. By providing a thorough and well-structured guide, this article positions itself as a go-to resource for anyone looking to recreate this delightful treat. The mention of "Kotamobagu" anchors the recipe geographically, appealing to local searchers while also giving it a unique selling point for those outside the region looking for inspiration. The promise of "cool" and "easy" further enhances its appeal to a broad audience seeking refreshing and accessible recipes. The detailed explanation of techniques like custard making and the importance of chilling time addresses common concerns and provides the knowledge necessary for success, building confidence in home cooks. Ultimately, this article provides a complete roadmap to achieving a restaurant-quality dessert in the comfort of your own kitchen.
